Fix Shirt Fit Problems Fast with 3 Tailor Checks for Men
Most shirt fit problems trace back to the shoulders, collar, or chest. Check those three first: run the two finger collar rule, look at where the shoulder seam sits, and pinch the fabric at your waist. If the shoulder seam is off, buy a different size or see a tailor. If it’s the collar or chest, alteration is usually straightforward and inexpensive.
TL;DR:
- Shoulder seam misalignment accounts for most fit issues and cannot be fixed through simple tailoring, often requiring a different size or bespoke solution.
- Collars should comfortably leave two fingers’ width, and any significant tightness or looseness usually necessitates buying the correct size from the start or replacing the collar.
- Gaping across the chest indicates the shirt is too narrow, and size adjustments are more effective if done before purchase rather than trying to alter a tight shirt already bought.
- Armholes that lift significantly when raising arms reveal poor fit, and bespoke design is more reliable than alterations for achieving proper shoulder and armhole positioning.
- Buying for shoulder and collar fit first, then adjusting the waist with darts, offers the most reliable and cost-effective way to achieve a sharp-looking shirt.
Table of Contents
- Shoulders: seam placement, diagnosing the defect and what to do next
- Collar: the two-finger rule, ties and adjustment options
- Chest and placket: read the pull lines and choose the proper sizing strategy
- Armhole and back fit: how armhole height affects movement and untucking
- Body and waist: pinch-test guidance and affordable tailoring fixes
- Sleeves and cuffs: correct length, taper and watch interaction
- Length and hem: tucked and untucked guidelines and quick fixes
- What tailors can fix, prioritised list with typical costs and expected outcomes
- Quick tests checklist: step-by-step diagnostics and a short decision flow
- Ron & Rich: tailor’s notes on misdiagnoses, fabric choice and when to choose bespoke
- An editorial take on where fit advice usually goes wrong
- Solving fit problems for good with a bespoke shirt
- Sources
Shoulders: seam placement, diagnosing the defect and what to do next
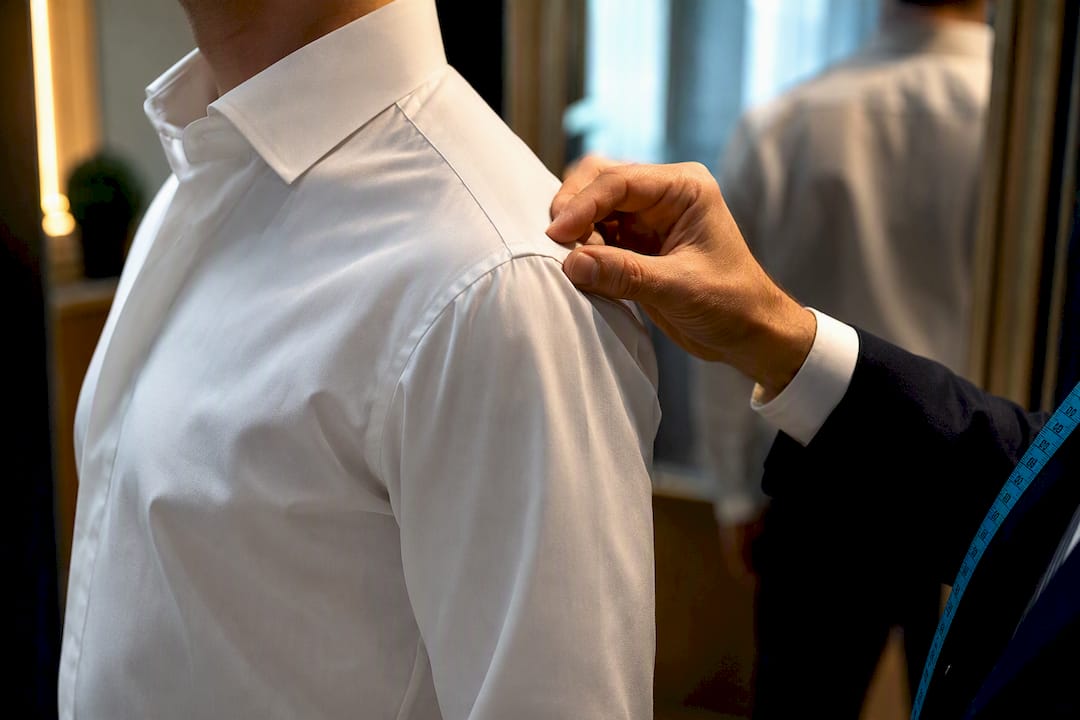
The shoulder seam should sit precisely at the bony corner where your shoulder meets your arm, no further. This one seam anchors everything else, the sleeve hang, the collar roll, the way the chest drapes. Get it wrong and no amount of tailoring elsewhere fixes the shirt properly. Shoulder seam position is the most common single point of failure on t-shirts, and the same principle governs dress shirts cut from woven cloth.
Diagnosing it takes a moment in front of a mirror:
- A seam riding up onto your shoulder blade or bicep means the shirt is too small across the shoulders.
- A seam drooping past the edge, sitting on your upper arm, signals a shirt cut too wide.
- Diagonal drag lines running from the collar toward the underarm usually mean the shoulder slope doesn’t match your own.
Shoulder width is structurally difficult to alter. A tailor can nudge a seam by a fraction, but rebuilding the whole shoulder line means unpicking the sleeve, the yoke, and often the collar too. When the seam placement is genuinely wrong, choosing a different size, a different cut, or moving to a bespoke pattern is usually the sounder route.
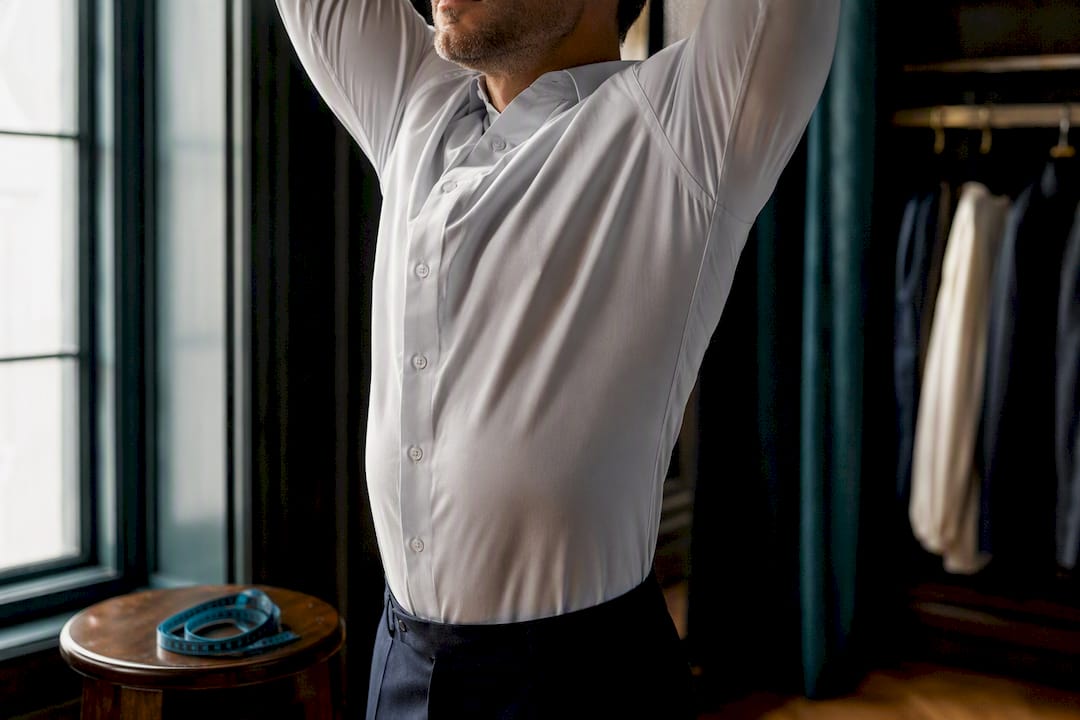
Pro Tip: Raise both arms overhead before you commit to a size. If the shoulder seam lifts more than an inch or the whole shirt rides up towards your chin, the shoulders are too narrow, no matter how the rest looks standing still.
Collar: the two-finger rule, ties and adjustment options
A buttoned collar should leave room for roughly a finger or two between the fabric and your neck. Too tight and you’ll feel it by lunchtime; too loose and the collar gapes open under a tie, undermining the whole look. If you wear a tie regularly, err toward the two-finger side, since a knot adds pressure the bare collar test won’t show.
Collar alterations are limited. A tailor can take in a fraction at the back, but reshaping a collar that’s genuinely the wrong size usually means:
- Replacing the collar entirely, which rarely justifies the cost on a ready-made shirt.
- Buying the correct collar size from the outset and adjusting elsewhere instead.
To measure your own collar for online shopping, wrap a tape measure around the base of your neck where the collar sits, add half an inch for breathing room, and round to the nearest half-size. Our dress shirt collar guide covers the style differences that affect how that number translates across brands.
Chest and placket: read the pull lines and choose the proper sizing strategy
Two visual clues tell you almost everything about chest fit. Gaping, where the placket pulls open between buttons, particularly at the chest or across the belly, means the shirt is too narrow there. Horizontal pull lines radiating outward from the buttons mean the same thing in a subtler form, the fabric straining rather than sitting flat.
Neither is comfortable to wear and both look poor under a jacket. The fix depends on where you are in the buying process:
- If you haven’t bought yet, size up for the chest and plan to have the waist taken in. Buying for collar and shoulder first, then using inexpensive waist suppression, is the highest-value approach most tailors recommend.
- If you already own the shirt and it gapes badly, letting it out is rarely possible. Manufacturers leave little seam allowance in ready-made shirts, so once the chest is genuinely too tight, the problem is close to irreversible.
- A shirt that gapes at rest but fits when you move is often salvageable with darts. One that gapes even standing still usually isn’t.
Armhole and back fit: how armhole height affects movement and untucking
Raise your arms above your head and watch what happens at your waist. If the entire shirt hem lifts with your arms, the armhole (the armscye) is cut too low, dragging the body of the shirt upward every time you reach for something. Armholes cut too high, by contrast, restrict movement and can feel tight across the underarm even when the chest measurement is correct.
The back tells its own story. Horizontal creases across the shoulder blades point to a back that’s too narrow or an armhole positioned wrong; diagonal drag lines running toward the underarm often mean the same. Our split yoke guide explains why the back panel’s construction affects how much these creases show up in the first place.
- Look for shirts patterned with a higher armhole if you want less fabric movement when reaching or bending.
- Bespoke shaping solves this more reliably than alteration, since armhole position is set early in pattern drafting.
Body and waist: pinch-test guidance and affordable tailoring fixes
The pinch test is the fastest way to judge torso ease, and the numbers differ by garment. For a t-shirt, aim to pinch roughly one inch of fabric at each side of your waist; less than half an inch is too clingy, more than two inches drifts into boxy territory. For a dress shirt, the comfortable range runs slightly wider.
- Pinch both sides of your waist through the shirt. Two to three inches of total excess, roughly an inch each side, gives comfortable movement without billowing.
- Anything beyond four inches total tends to bunch visibly at the waistband and bulge under a jacket.
- If the excess is even and moderate, darts or side-seam alterations solve it cheaply and reliably, since the tailor is simply removing fabric along an existing seam line rather than rebuilding structure.
This is the single best-value alteration available on almost any shirt.
Sleeves and cuffs: correct length, taper and watch interaction
A dress shirt sleeve should end with the cuff resting approximately at your wrist bone, with a small sliver of cuff visible beneath your jacket sleeve when your arm hangs naturally. Too short and the cuff disappears under the jacket; too long and it bunches over the hand.
- Sleeves that are simply too long shorten easily and cheaply, one of the most common alterations tailors perform.
- Sleeves that are too wide along their length, rather than just too long, need slimming, which is more involved but still worthwhile on an otherwise good shirt.
- Try shirts on wearing the watch you actually wear daily. A cuff that clears your watch face comfortably in the shop can catch on it constantly in real use.
Length and hem: tucked and untucked guidelines and quick fixes
A shirt meant for tucking should extend enough below your waistband to stay put through a full day of sitting, reaching, and moving without pulling free. A shirt meant to be worn untucked should hit around mid-fly, short enough to sit cleanly at the hip rather than flapping past it.
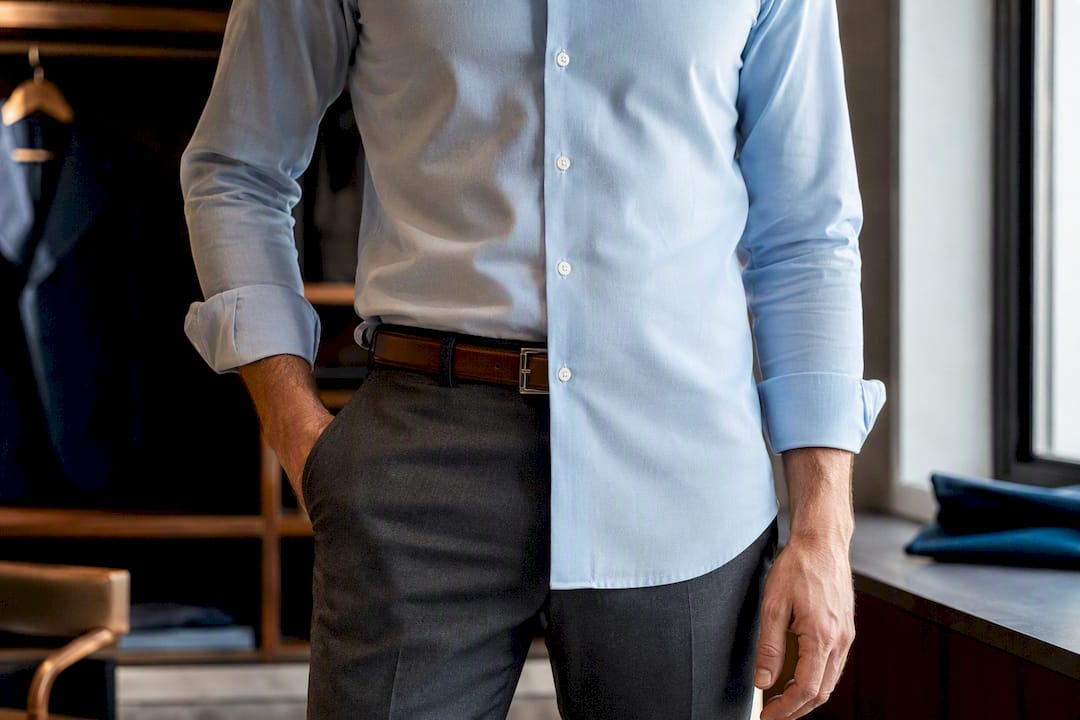
Test both scenarios before deciding a shirt fits: sit down and reach overhead, then check what happens at the hem. A shirt that rides completely untucked from a normal reach is too short for tucked wear. Bodies can be shortened by a competent tailor for relatively little; our shirt length guide covers how that alteration is done. If you mostly wear shirts untucked, buying a style cut for that purpose avoids the issue altogether.
What tailors can fix, prioritised list with typical costs and expected outcomes
Not every fit problem deserves the same investment. Some alterations transform a shirt for a modest fee; others cost nearly as much as buying a properly fitted shirt in the first place, with a weaker result.
- Taking in the sides or adding darts: high value, low cost. Solves excess waist fabric reliably and quickly.
- Shortening sleeves: moderate cost, dependable outcome, one of the most commonly requested alterations.
- Slimming sleeve width: moderate cost, only worth it if the rest of the shirt fits well.
- Shoulder adjustments: expensive and limited in what they can achieve, since the seam anchors the whole garment.
- Collar replacement: often not cost-effective on a ready-made shirt, given the labour involved versus buying correctly sized.
Waist suppression, taking in the sides or adding darts, consistently delivers the biggest visual improvement for the smallest outlay of any shirt alteration.
The decision flow is simple in practice. If the problem sits at the waist, alter it. If it sits at the shoulder, replace the shirt or go bespoke. Everything else falls somewhere between those two poles, weighed against what the shirt cost you to begin with.
Quick tests checklist: step-by-step diagnostics and a short decision flow
A short sequence of checks, run in order, catches nearly every common problem inside two minutes.
- Pinch test: pinch fabric at each side of the waist. One inch for a t-shirt, one to one and a half inches per side for a dress shirt is comfortable; more means size down or alter, less means size up.
- Collar test: fit one to two fingers between the buttoned collar and your neck. Too tight, go up a size; too loose, go down or plan for a tailored collar.
- Shoulder seam check: confirm the seam sits at the bony corner of your shoulder. If it doesn’t, no other fix matters until this is resolved.
- Reach test: raise your arms overhead. If the hem lifts dramatically or the shoulders ride up, the armhole or shoulder is wrong.
- Sleeve check: confirm the cuff sits at the wrist bone with a sliver visible past the jacket sleeve.
Pro Tip: When shopping online, compare the collar and shoulder measurements against your own body first, before chest or length. Those two are the hardest to fix after purchase, so they should decide whether a shirt is even worth ordering.
Ron & Rich: tailor’s notes on misdiagnoses, fabric choice and when to choose bespoke
The shoulder is the most commonly misdiagnosed fit problem we see. Clients often blame the chest or the size overall when the actual fault sits at the shoulder seam, sometimes an asymmetry in their own posture rather than the shirt itself. Lifting the shoulder seam and watching how it moves helps separate a true shoulder issue from a postural one before any alteration is attempted.
Fabric and construction change how forgiving a shirt feels. Crisp poplin shows every fit error clearly, while oxford or twill’s softer drape can mask minor issues. On t-shirts, side-seamed construction follows the body’s contours and holds its shape through repeated washing far better than tubular knitting, which tends to sag into a boxier shape over time.
- Buy for collar and shoulder first; adjust the waist afterwards.
- Favour side-seamed construction for t-shirts you expect to wear for years.
- Explore our shirt gusset guide for how reinforcement details affect fit longevity in bespoke work.
An editorial take on where fit advice usually goes wrong
Most guides treat shirt fit as a single measurement problem, get the chest size right and everything else follows. That’s backwards. The evidence points to the shoulder seam as the real fault line, and it’s the one area most men never think to check because it doesn’t announce itself the way a tight chest or loose collar does. It just quietly ruins the drape of everything below it.
The conventional advice to “size up if in doubt” causes more harm than good here. Sizing up fixes a tight chest but pushes the shoulder seam further onto the arm, creating a new problem while solving an old one. The better instinct, backed by how alterations actually work in practice, is to buy for the shoulder and collar, accept a slightly loose chest if necessary, and fix the waist with darts. That single alteration is cheap, reliable, and solves the complaint most people actually have: a shirt that looks baggy rather than sharp.
If you take one thing from this, prioritise the parts of the shirt that are hard to alter when buying, and worry less about the parts that are easy to fix afterwards.
Aaron & Richard Fan
Solving fit problems for good with a bespoke shirt
A mtm consultation exists precisely for the problems alteration can’t reach, shoulder pitch, armhole shaping, and pattern balance built around your actual posture rather than a standard block size. Where a ready-made shirt asks you to compromise on at least one measurement, a mtm pattern is drafted around all of them at once.

Bring a shirt you already like the fit of, or simply be ready to discuss where your current shirts fall short, tight across the shoulders, gaping at the chest, sleeves that never sit right. Our bespoke tailoring process walks through measurement and fitting in detail, and most first-time clients move from initial consultation to finished shirt within a few weeks. Visit our bespoke landing page to book a first appointment, or browse the shirting collection to see the range before you come in.
Sources
- How a Dress Shirt Should Fit: The 9-Point Check | Mr.Wayne
- Side-seamed vs tubular t-shirts, Printful
- T-Shirt Fit Guide: How a Tee Should Actually Fit, Boring Label